If you have any questions or dificulities manging your business website, just reach out to our Customer Success Managers!
By using web forms you can allow your website visitors and customers to get in touch with you, request a service, or send an application. With VEVS you can create unlimited website forms.
By default, all VEVS Website solutions come with a Contact Us page. You can switch the page on and off, but you can also manage the form fields and settings. Some of the VEVS solutions have additional web forms added by default because they are considered an industry standard and a must-have. For example, the Finance Application Form for the Car Dealer Website or Send a Request for the Real Estate Website. With the Web Forms App, you can create any web forms that you need for your business.
Each web form will be created on a designated web page. You will be able to choose a layout for your web form page among a few available options.
Form fields
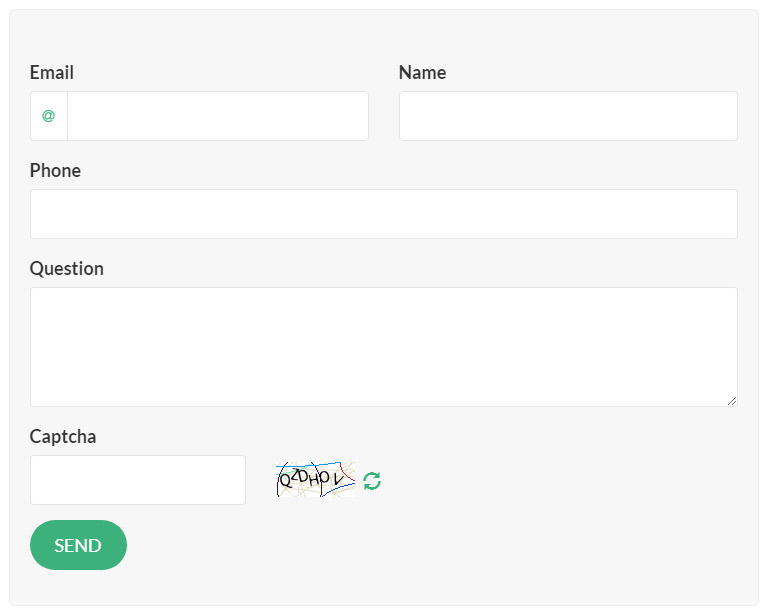
You can add as many fields as you need in your website form. You can choose from different field types like - Email, Text Field, Text Area, Drop-down, Radio buttons, Checkbox, Date picker.
You have various options for your fields depending on the field type:
- Label - the name of the field
- Required - if a field is required your website visitors will have to fill it in before they submit the web form.
- Option data - define the options your visitors will have for drop-down, radio buttons, and check-box fields. Add each option in a new row.
- Hint text - a grey text that will show in the field as a hint what visitors are supposed to fill into that field.
- Default value - pre-populated reply that will be submitted as a field value if the visitor does not fill in anything else.
- Max length - the maximum allowed number of characters allowed for the field.
- Validation - you can switch on validation of the field. If the data in the field does qualify the system will show the validation error that you specify and will not allow form submission.
You also have a few special form fields:
- Text headers - use them as titles of the form or different sections of the form, or as a text to provide information or guideline to your visitors.
- Files upload
- Captcha - we highly recommend using Captcha to prevent spam bots and keep your website secure.
- Submit Button - don’t forget to add a Submit button. It will send the form details to you. You can rename the button however you want, but without it your visitors will not be able to submit their request.
Form layout and alignment
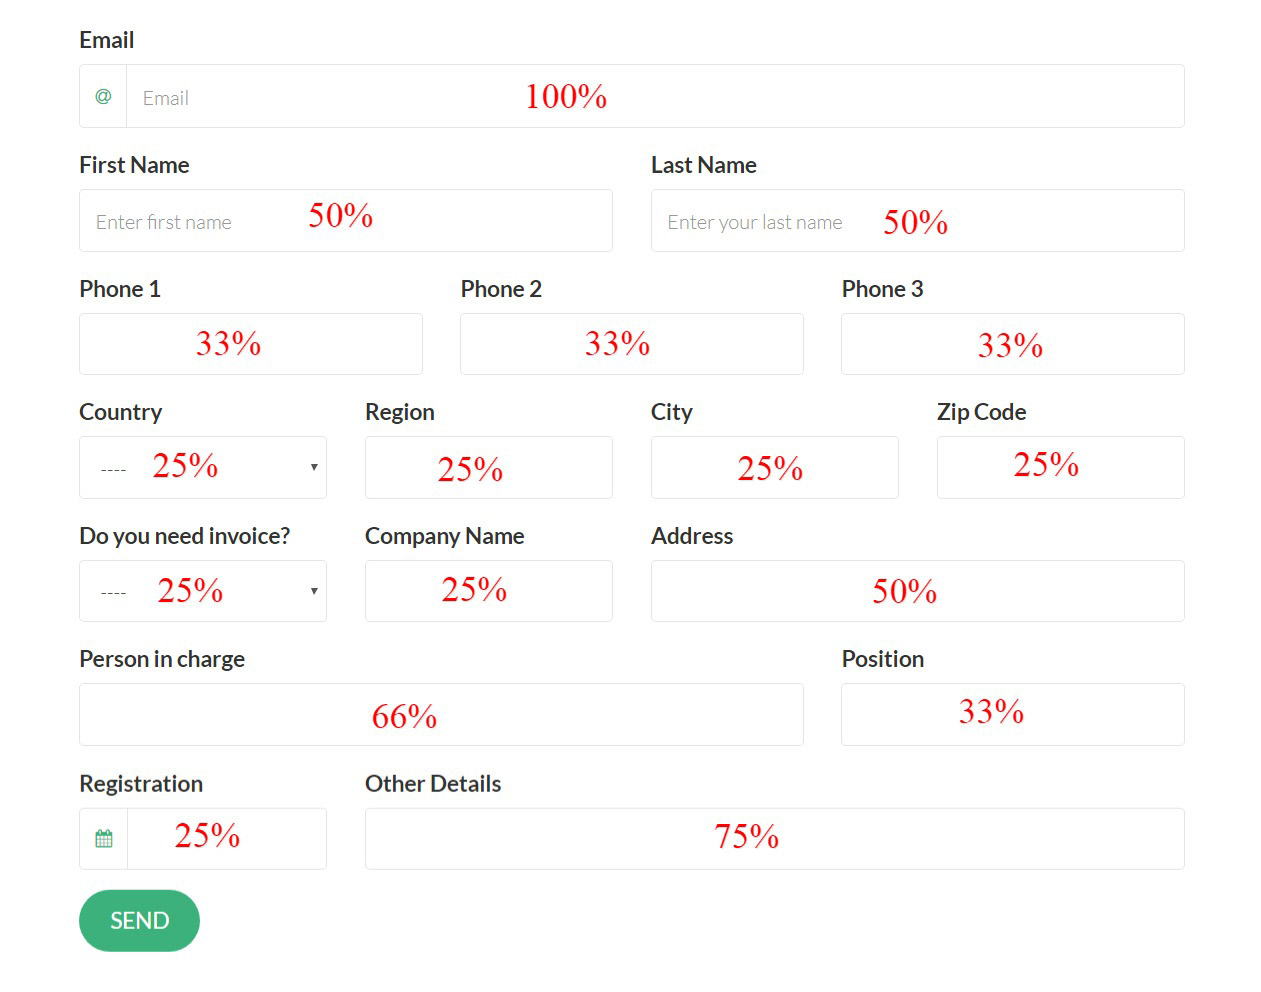
You can manage the web form layout and alignment via the Grid Columns option for each field. The Grid Columns specifies the field width in percentage or columns. You can align between 1 and 4 fields in a row. Then you can order the fields by drag & drop to get the alignment you need.
To have one field in a row you have to set the ‘Grid Columns’ setting at 100%. If you want to have 2 fields in a row, then both should be set at 50%. 3 fields in a row, would require all of them to be at 33%. While 4 fields in a row will need setting their ‘Grid Columns’ at 25% each. Find below some more samples.
Form settings
Email notification to you
You will have all form submissions recorded in the Submissions tab of the Web Forms App page. You can also receive an automated email notification on your email address every time someone sends you a form request. Specify Email Subject and Receiver (‘Send to’ field) in the Form Details tab. You can choose as a Receiver one or multiple users from your website admin area users list.
Email notification to website visitors
You can also send an email notification to the website visitors who submitted a form. You can compose the email message from the Autoresponder tab. Leave the Subject and Message fields empty if you do not want to send an email notification.
Anti-spam options
You have various spam-filtering options that you can enable to protect yourself from spambots: Honey-pot; CSRF token; Referer header; Origin header.
You can also use a Captcha field. It could be random text string

or a math challenge captcha.

Other options you have to protect yourself from spam messages is to forbid links in the message or block a list of words.
Webform page content and settings
Each form is located on its individual page that you create along with the form. The page has the name of the form, but you can change that. You can manage the content on that page, other than the web form itself, just like any other static page content. The content you have on the page will depend on the chosen layout.
The page, where the web form is located, has the same settings and control options like any other static page - you can manage page name and URL, meta tags, page layout, add it to the menu.
Once you set up the web form and its page, you can make the page active and add it to your website menu if needed.
Hints. Some useful tips to follow when you create your web form:
- Don’t forget to collect customer data that would be useful to contact back your lead.
- Make the form as clear and simple as it can.
- Provide info and hints where needed if the form or the fields are complex to understand.
- Send an email confirmation to your customers so they know that their request is received and when they can expect a reply back from you.
- Use anti-spam filters to avoid getting spam messages. They also protect your website. Flooding the server with messages is the most common practice for a hacker attack.


