If you have any questions or dificulities manging your business website, just reach out to our Customer Success Managers!
As part of our services offer Email accounts created by us for your website domain name such as *@yourdomain.com
Once you have the email accounts created by us - you can set them up to access and manage them via an email client program like Outlook, Mozilla Thunderbird or another one of your choosing OR use the Webmail site to access it directly from your browser of choice.
For Email accounts created before Dec 2019:
If you wish to use the Email accounts directly from your browser via our online Webmail service - visit the following link and use your Email account credentials:
https://webmail.vevs.com
Use the provided POP3/IMAP and SMTP details below to set up your email accounts with the email program of your choice:
webmail.vevs.com
Requires SSL: Yes
IMAP Port: 993
POP3 Port: 995
webmail.vevs.com
Requires SSL: Yes
Requires Authentication: Yes
SMTP Port: 465
Your full email address
Your Email password
* We recommend sending test emails from and to your new email accounts using some other email of yours, so you can verify that all is working fine.
For Email accounts created after Dec 2019:
If you wish to use the Email accounts directly from your browser via our online Webmail service - visit the following link and use your Email account credentials:
https://clients.vevs.website
Use the provided POP3/IMAP and SMTP details below to set up your email accounts with the email program of your choice:
clients.vevs.website
Requires SSL: Yes
IMAP Port: 993
POP3 Port: 995
clients.vevs.website
Requires SSL: Yes
Requires Authentication: Yes
SMTP Port: 465
Your full email address
Your Email password
* We recommend sending test emails from and to your new email accounts using some other email of yours, so you can verify that all is working fine.
Setting up Gmail to be used as your email client for your VEVS account:
Setting the ability for Gmail to send emails through your VEVS email account:
In order to fully condense the use of another email address into just your Gmail account, you'll need to first configure your Gmail account to be able to send mail from that account. After going through this process, you will be able to send email from within your Gmail account that looks as though it was sent from your email address that we have created for your domain name — neat stuff indeed.
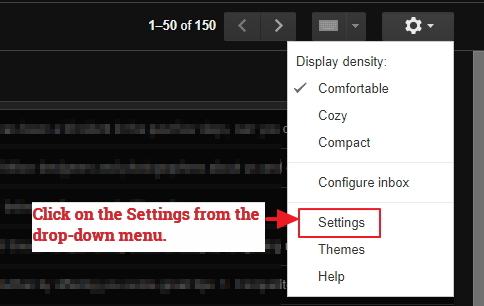
- Go to your Gmail settings on the web.
In Gmail on the web, go the Settings by clicking the gear in the top-right corner of the interface and clicking "Settings". On the next screen, click the tab at the top of the interface labeled "Accounts and Import". Then click "Add another email address you own", which will show up underneath your main Gmail account in the "Send mail as:" section.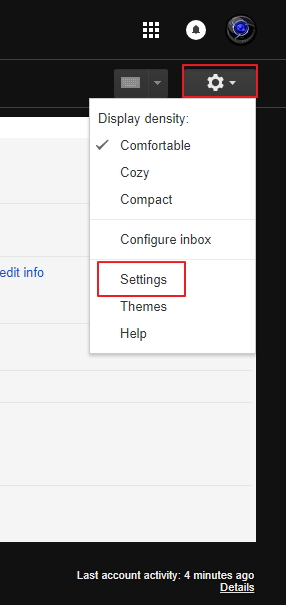
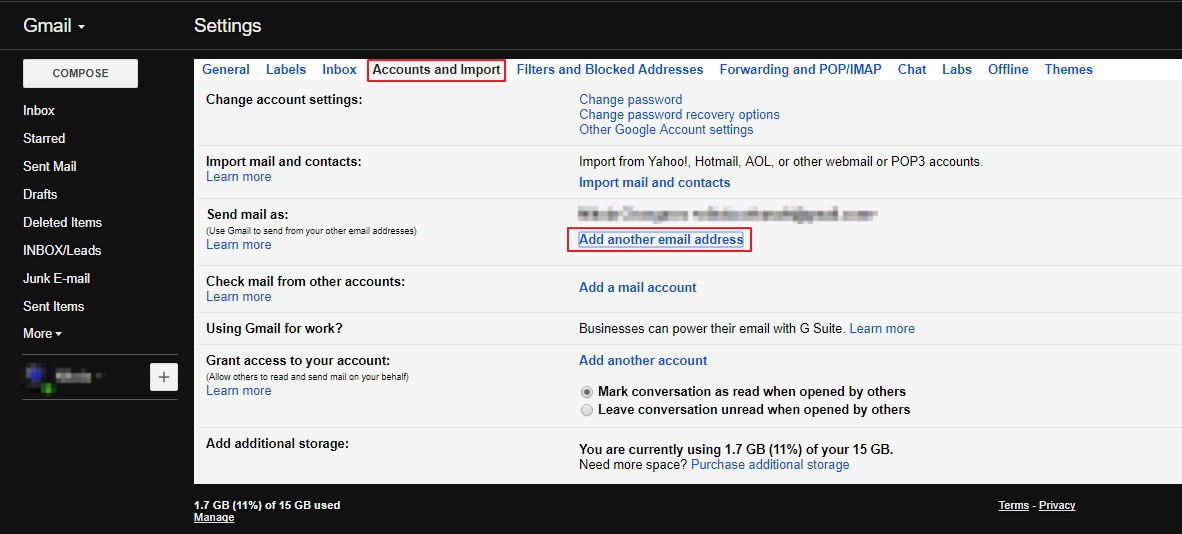
- Enter the email address we created for you.
When you click that link, it'll pop open a window that walks you through the steps of configuring another email address.
First, you'll enter a name for the account (auto-filled with your own name), and then the full email address. By default, the address will be treated as an alias — this means you'll be able to send an email that looks exactly as it would coming directly from that address, rather than from another provider. Click "Next step".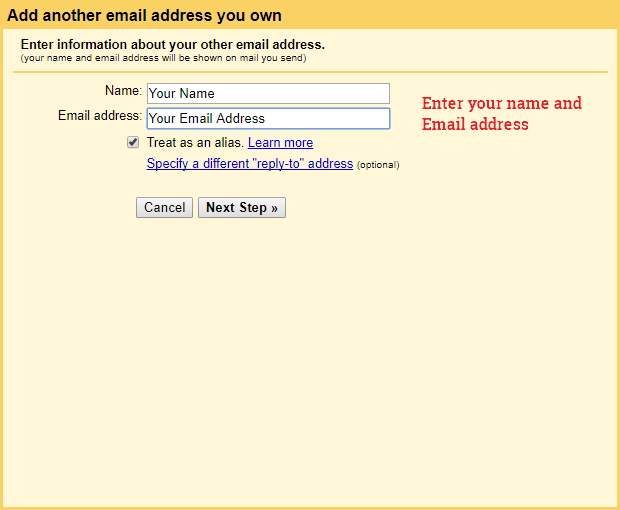
- Choose SMTP server
Here you will be presented with the options to set up the SMTP settings for your email accounts which we created for your domain name. This will be needed in order to allow you to send the emails via your Gmail account. You should set the following details:
If your email accounts are created before Dec 2019:
SMTP Server: webmail.vevs.com
Port:465
Username: Your full email address name as provided by the VEVS support
Password: The email address password as provided by VEVS support
If your email accounts are created after Dec 2019:
SMTP Server: clients.vevs.website
Port:465
Username: Your full email address name as provided by the VEVS support
Password: The email address password as provided by VEVS support
Click "Next step".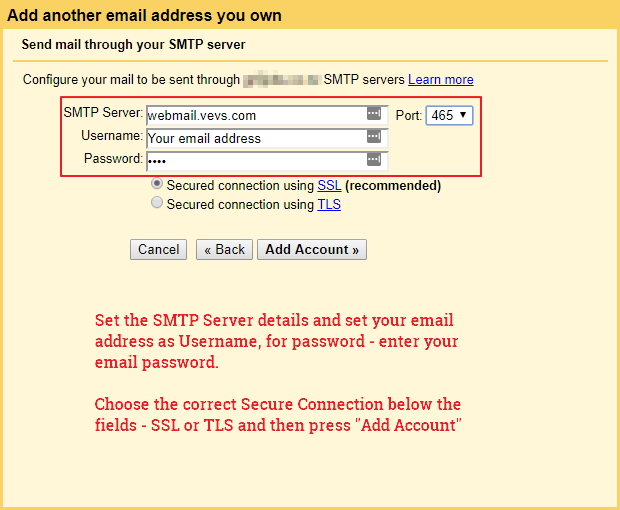
- Verification email send, receive and enter verification code.

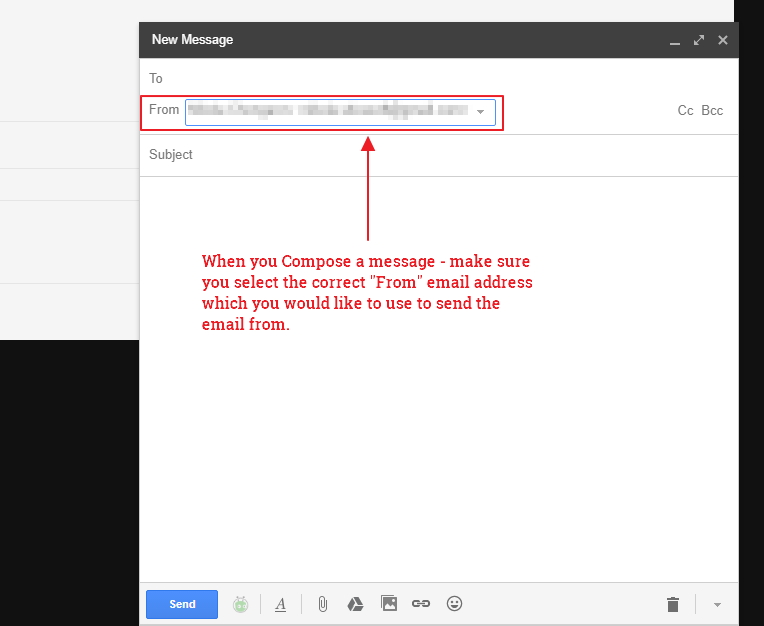
- Send Email from the email account we have created for you:
Receiving emails from your accounts created by VEVS directly into Gmail:
The standardized way to accomplish this is with a protocol called POP3, which will let Gmail periodically pull email from another account and have it arrive in your Gmail inbox.
To get started, head back into the Gmail settings on the web and look for the "Add a POP3 mail account you own" option, which is directly underneath where you just added your other email accounts. Click that link, and a window will pop up to get you started.
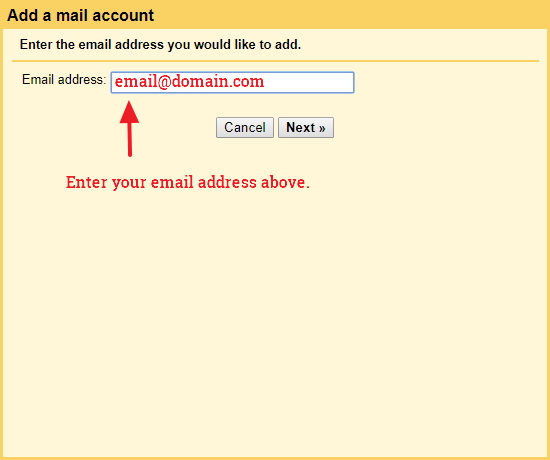
Enter your email address, password and configuration options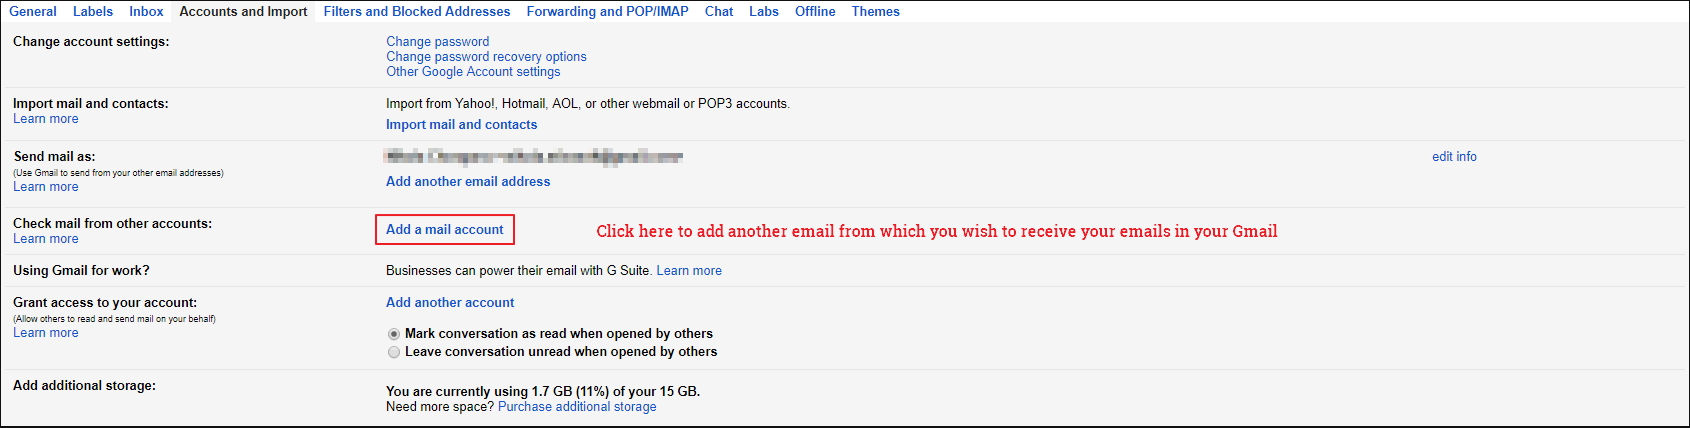
You'll be prompted to enter the email address which you'd like to receive the emails from.
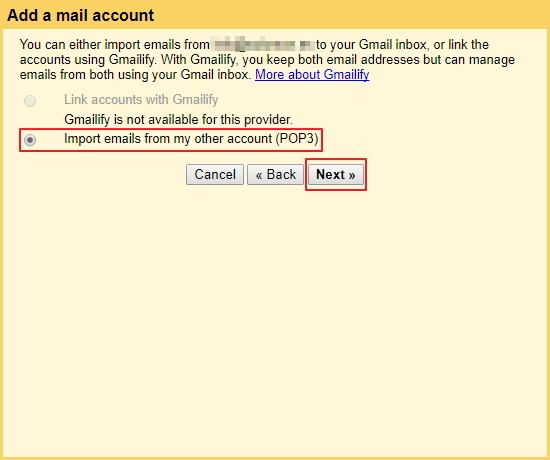
Choose "Import emails from my other account (POP3)" option and click "Next".
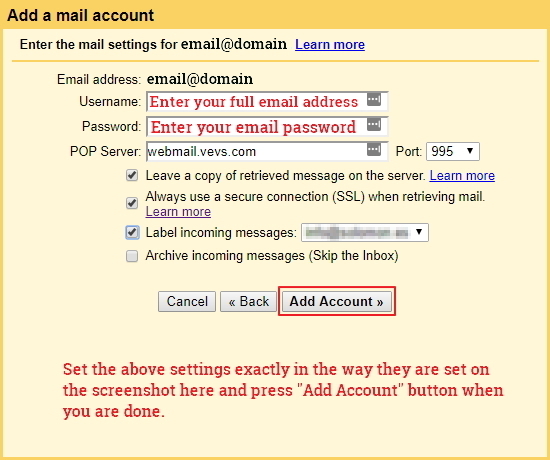
You'll find a slightly more complicated screen to do all of the configuration at once. You'll need to enter the following:
1. Username: (Enter your full email account name as provided by the VEVS team)
2. Password: (The password provided to you by the VEVS team or the one you have set later via the Webmail page)
3. POP server:
If your emails are created before Dec 2019 enter: webmail.vevs.com
If your emails are created after Dec 2019 enter: clients.vevs.website
4. Port: 995
5. Check the checkbox for the following additional settings:
- "Leave a copy of retrieved message on the server"
- "Label incoming messages"
6. Click on "Add Account"
Once you set the above settings you will start receiving the emails from the email account our VEVS Support Staff has set up for your domain name.
Setup your VEVS email account on MS Outlook 2016/2019
If you have chosen to use VEVS as your email provider along with having us providing your website services and also have an email account for your domain name created by us already, here is how you can set the email account on Microsoft Outlook from the latest Microsoft Office pack:
First you will have to start Microsoft Outlook.
After that follow the instructions provided below:
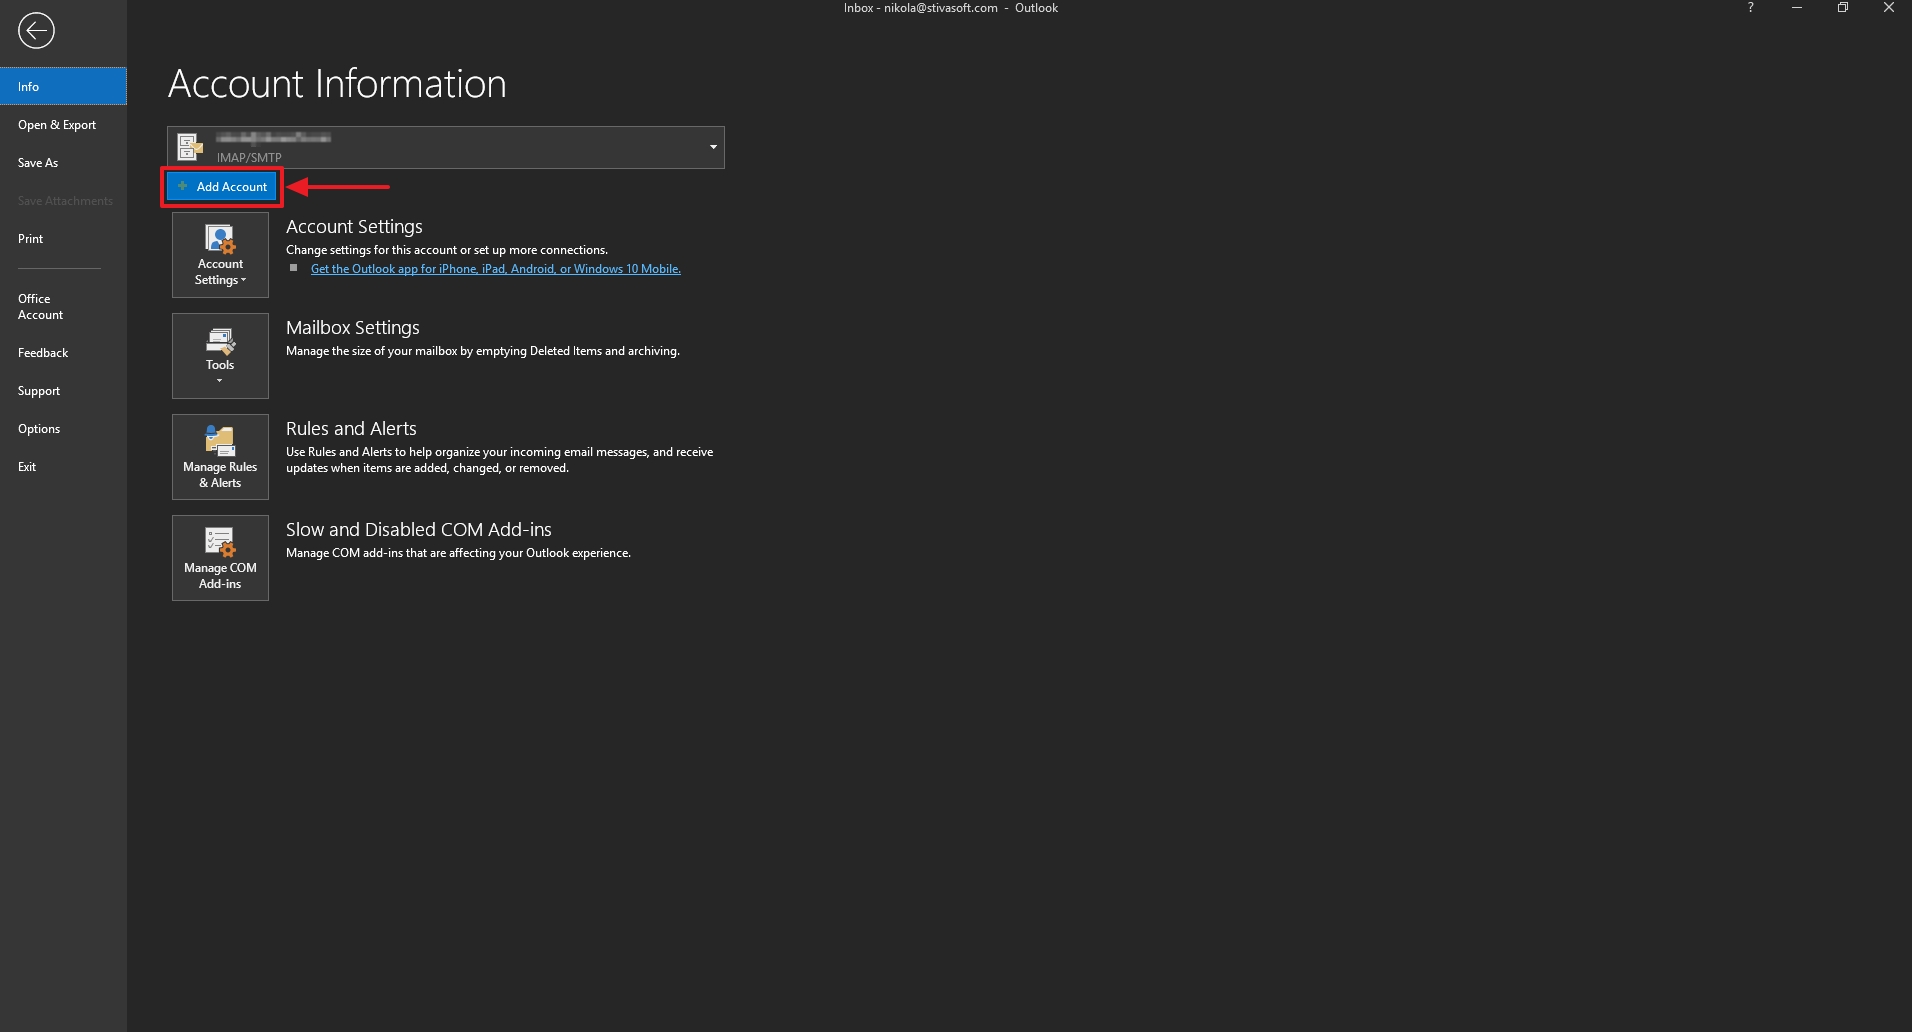
- Click on the File menu

- Click the "Add account" option
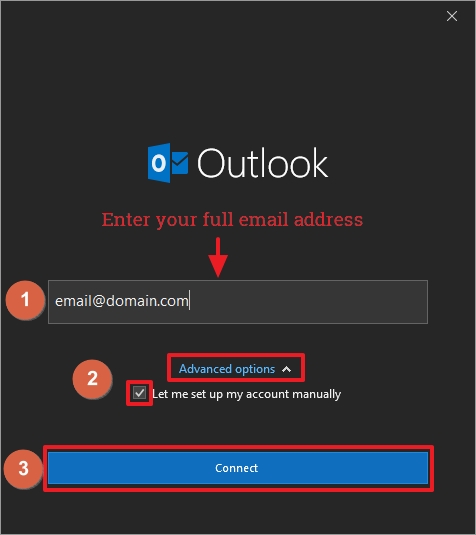
- Enter your email address in the email field and click on "Advanced options" and check the box in front of "Let me set up my account manually"
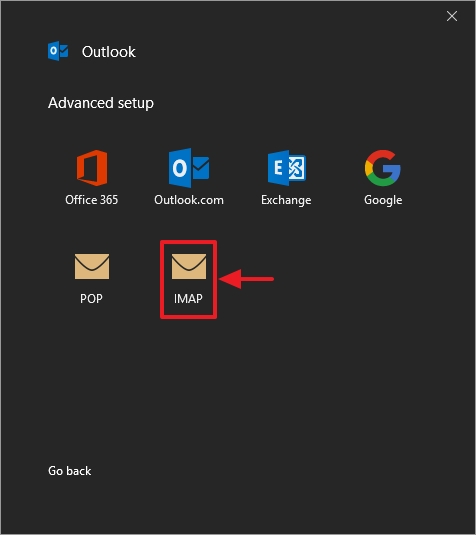
- Select IMAP from the list of services
- Set the server settings exactly as provided:
If your emails are created before Dec 2019:
Incoming mail server: webmail.vevs.com
Port: 993
Encryption method: SSL/TLS
Require logon using SPA: check the box
Outgoing mail server: webmail.vevs.com
Port: 465
Encryption method: SSL/TLS
Require logon using SPA: check the box
If your emails are created after Dec 2019:
Incoming mail server: clients.vevs.website
Port: 993
Encryption method: SSL/TLS
Require logon using SPA: check the box
Outgoing mail server: clients.vevs.website
Port: 465
Encryption method: SSL/TLS
Require logon using SPA: check the box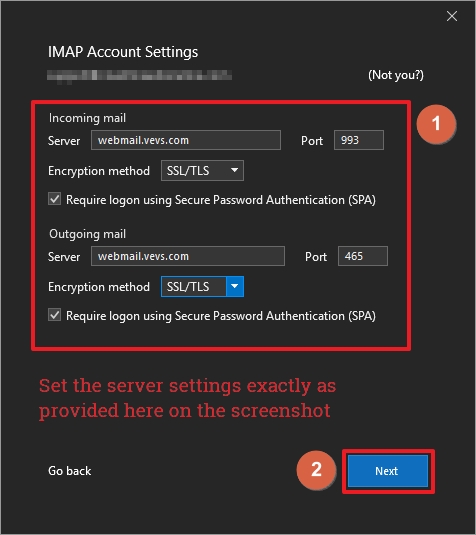
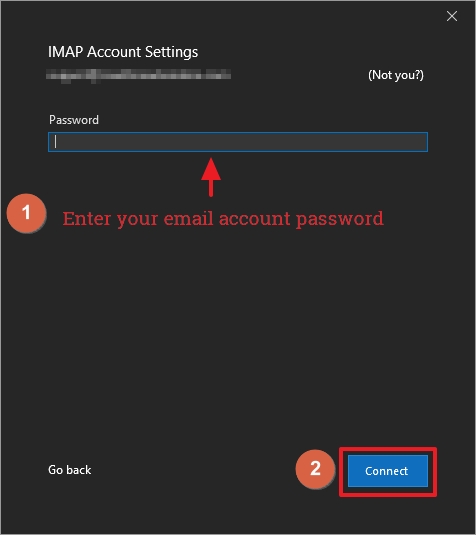
- Enter your email account password
Setup your VEVS email account on Mobile Outlook app
To set up your VEVS Email account on the Outlook App on your Mobile Device just fill up the following fields as described below:
Start the Microsoft Outlook app on your mobile device.
After that follow the instructions provided below:
Set up an IMAP account manually in Outlook for iOS or Outlook for Android
-
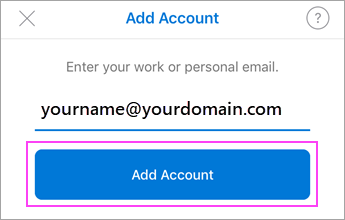
In Outlook for iOS/Android, go to Settings > Add Account > Add Email Account.
-
Enter your full email address. Tap Add Account.
-
If you see the Select your email provider screen, choose IMAP.
-
Enter your email password and toggle "ON" Use Advanced Settings.
-
Enter the server setting information needed.
Email Address:
Enter your full email address (e.g. youremail@yourdomain.com)
Display Name:
Enter your preferred name here (e.g. John Henry Holiday)
Description:
You can leave this one blank or set any description that will help you recognize the email purpose (e.g. Work; Marketing; etc.)
IMAP Incoming Mail Server
IMAP Host Name (for emails created before Dec 2019):
webmail.vevs.com:993
IMAP Host Name (for emails created after Dec 2019):
clients.vevs.website:993
IMAP Username:
Enter your full email address here including the domain name (e.g. youremail@yourdomain.com)
IMAP Password:
Enter the email account password.
SMTP Outgoing Mail Server
SMTP Host Name (for emails created before Dec 2019):
webmail.vevs.com:465
SMTP Host Name (for emails created after Dec 2019):
clients.vevs.website:465
SMTP Username:
Enter your full email address here including the domain name (e.g. youremail@yourdomain.com)
SMTP Password:
Enter the email account password.-
Tap Sign In (iOS) or the Check sign on the upper right corner (Android).
You are all set and ready to use your VEVS email account on your mobile device via the Outlook app.


