If you have any questions or dificulities manging your business website, just reach out to our Customer Success Managers!
How to edit the text content on your web pages
You can easily change the text content on your website using the Text Editor integrated in the VEVS CMS. Just log in, go to the Website Pages menu and select the page you would like to edit.
To see how this works, watch the video tutorial below:
How to add images into the text description fields
Our website builders allow you as an admin to add images to the blog posts, text descriptions fields, email notification templates, documents, etc.
All you need to do is - to pre-upload the image on your website so you can use it within your text editor on the site.
Please follow the steps below to have your images uploaded and ready for being attached to the text fields mentioned above:
- Upload the image - Go to the Website Admin page / Apps & Content menu
- Go to Images & Photos menu
- Select "My Uploads" as Filter by Place option
- Press the Upload Files button
- The image will be uploaded to the folder

Now let's check the image URL that you can use to set it up in a paragraph of text on your website.
- When you are still in the My Uploads folder - you will see the image you have uploaded
- Click on the Eye (Preview) icon under the image and you will be redirected to a new page with the image opened up for preview there

- Copy the URL link to the image from the Address bar of your browser

Now you have the source URL of the image.
To use it in the website listing description, blog posts and notification email or document templates do the following:
- Go to the Notifications menu for example
- On the Notification template box, you will see a button resembling an image (this is the insert image button)
- Position to cursor next to the place in the template you wish to add the image and click that button
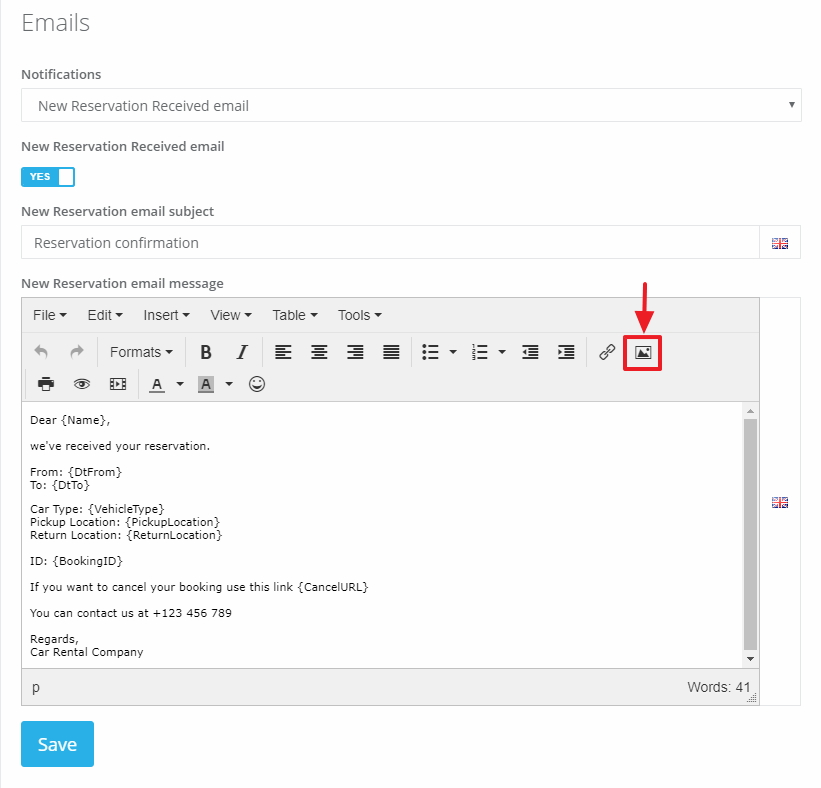
- An "Insert Image" setting will open up
- On the source field - paste the copied image URL
- Set the rest of the options presented there (dimensions, image description, etc.)
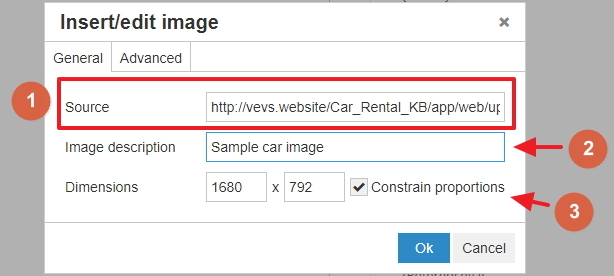
- Click OK when ready
- The image will appear in the template


Now you are all done, just save your template settings and you will have an image inside the template.


